Some griddles do not need a light cleaning. They need surgery. Heavy rust, baked-on grease buildup, and flaking old seasoning mean the surface has broken down to the point where no amount of scraping and re-oiling will fix it. The only move is to strip everything back to bare steel and start fresh.
That is exactly what this guide covers. I took my father's Blackstone that had been sitting outside all winter while he was in Florida, badly neglected and well past the point of a routine cleaning, and brought it back using a knotted wire wheel on a DeWalt angle grinder and 60-grit sandpaper. The process is aggressive, but the result is a surface that is cleaner and more ready to season than most new griddles out of the box.
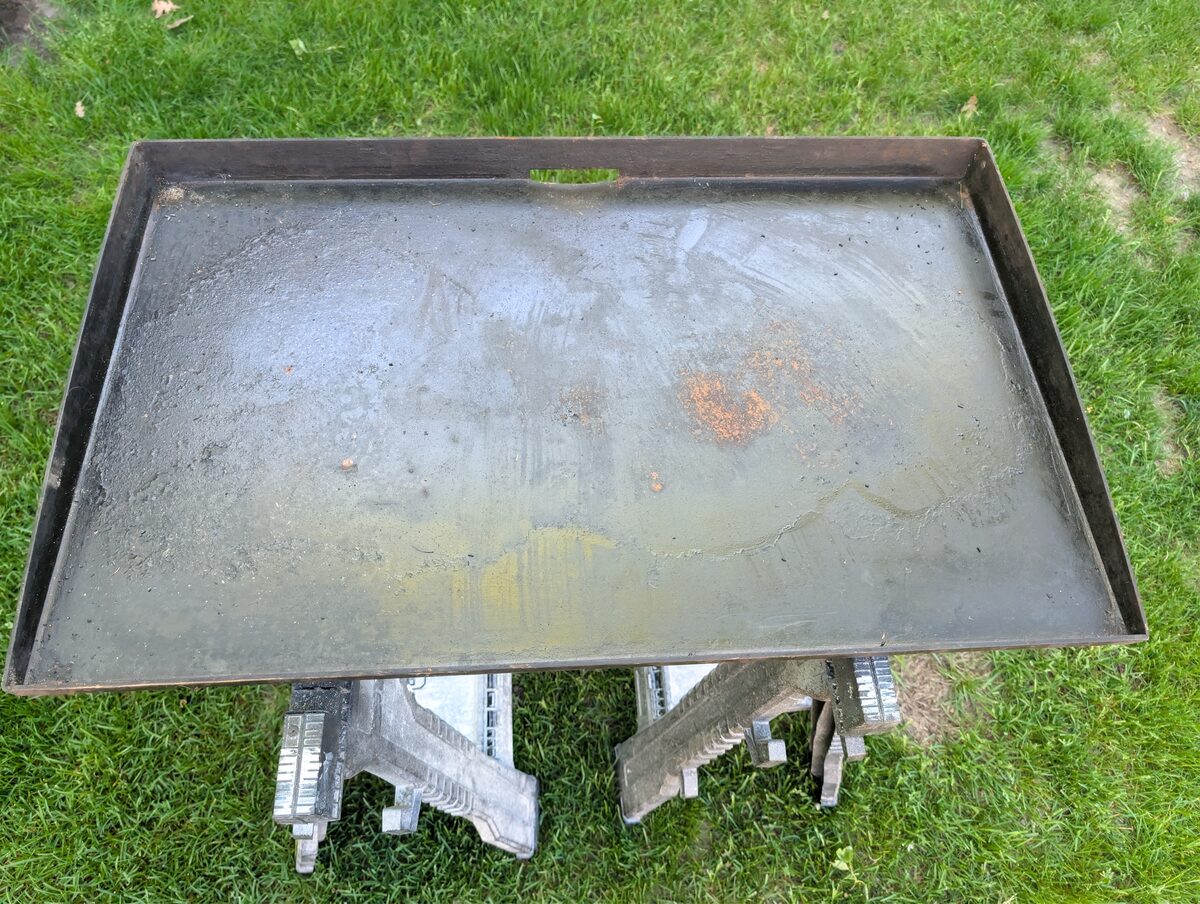
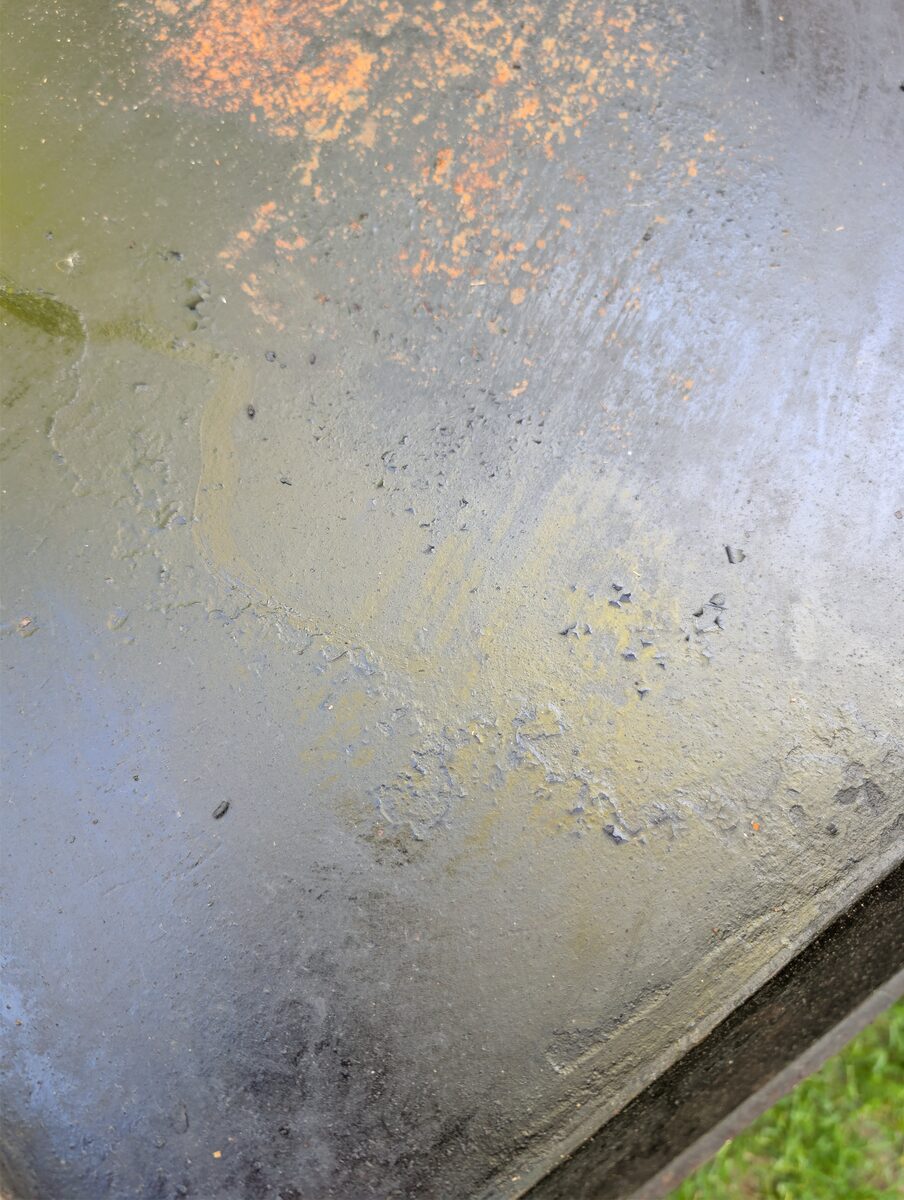
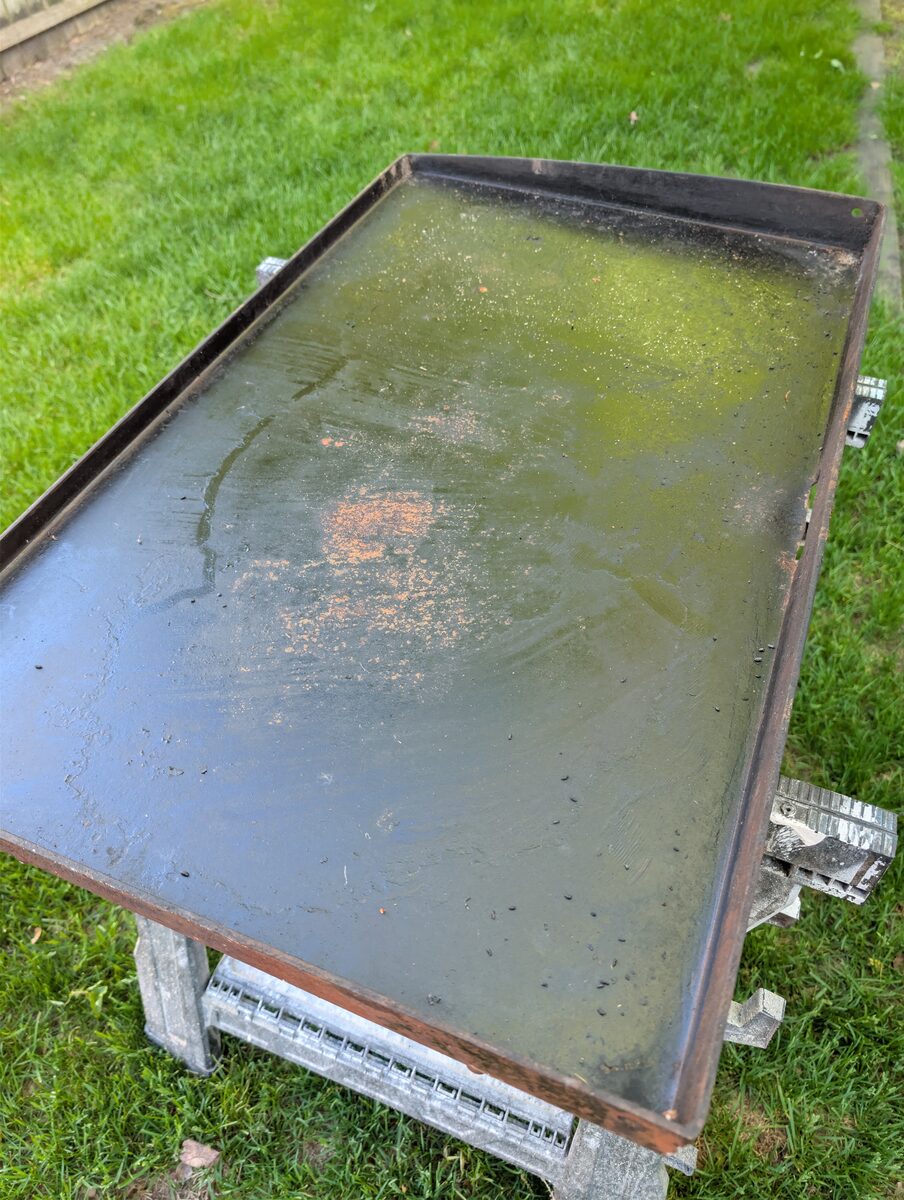
What the Griddle Looked Like Before
Before touching it with any tools, here is what I was working with. Thick rust, old carbonized seasoning flaking off in sheets, and spots where moisture had gotten under the surface layer and lifted it completely.
What You Need
You do not need a lot of gear for this, but what you use matters. Here is the exact setup I used on this restoration.
- Angle grinder (I used a DeWalt) with a knotted wire wheel attachment for the heavy rust and old seasoning removal
- 60-grit sandpaper for working edges, corners, and any spots the wire wheel cannot reach cleanly
- Safety glasses and work gloves (non-negotiable with a wire wheel spinning at speed)
- Paper towels and a clean rag for wiping down between stages
- Dish soap and warm water for the final pre-season wash
- Blackstone Seasoning Conditioner or high smoke point oil (avocado oil, grapeseed oil, or Crisco) for building the new seasoning layers
Step 1: Strip the Surface with the Wire Wheel
Attach the knotted wire wheel to the grinder. A knotted wheel (twisted wire bundles) is more aggressive than a crimped wheel and cuts through heavy rust and old seasoning much faster. Start at one end of the griddle and work in overlapping passes, keeping the wheel moving. Do not hold it in one spot or you will dig into the steel unevenly.
This is not a quick or easy job. Set aside a few hours and go in expecting to work. The grinder is loud, the sparks fly, and your arms will feel it. You have to be aggressive. Timid passes with the wire wheel accomplish almost nothing against a griddle that has been neglected for months or years. Press into the surface and let the wheel do what it was designed to do.
One thing nobody tells you: even a quality knotted wire wheel has a limited life, and a heavily rusted griddle will burn through one fast. The wires splay out, the wheel loses its bite, and suddenly it is just spinning on the surface without actually removing anything. If you notice the wheel is no longer cutting effectively, do not push harder hoping it will improve. Swap it out. Having a spare wheel on hand before you start is not overkill. It is just realistic planning.
Work the entire cooking surface until you have removed all visible rust, flaking seasoning, and carbonized buildup. The goal is not a mirror finish. You want clean, bare steel with a uniform appearance. Some light surface marks from the wire wheel are fine and will actually help the new seasoning bond.
Step 2: Finish with 60-Grit Sandpaper
The wire wheel does the heavy lifting, but it will not get everything. The flat cooking surface will look good, but the edges, the walls, and especially the corners will still have rust and old seasoning the wheel could not reach. That is what the sandpaper is for. This is where you finish the job.
Tear off a workable piece of 60-grit and go after everything the wheel missed. Use short, scrubbing strokes. Be rough about it. You are working rolled steel, not a finished cabinet. It is much harder to damage than you think. Scrub the side walls, the lip around the edge, and anywhere the grinder could not fit. Do not rush the edges just because they are less visible. Rust does not care how hidden it is.
Pay special attention to the corners where the side walls meet the cooking surface. Get in there with the sandpaper folded tight and work it by hand. And for the really tight spots, the three-way corners where two walls and the cooking surface all come together, use a flat-head screwdriver. Wrap a small piece of sandpaper around the tip and use it to drive into that corner and scrub. It is the only thing that actually fits. A brush, a rag, your finger wrapped in sandpaper, none of them get into a tight welded corner the way a screwdriver does.
Just use some common sense. Be aggressive, not destructive. You are cleaning the surface, not excavating it. (And if you somehow overdo it, that is on you, not me.)
Once the entire surface, edges, walls, and corners all look and feel uniformly clean, wipe everything down thoroughly with dry paper towels to remove the dust and loose debris before moving on.
Step 3: Wash, Rinse, and Dry Completely
Do not rush steps 1 and 2. You can go back to the wire wheel or the sandpaper at any point if you spot something you missed. Get it right before you move on.
When you are satisfied, wash the surface with warm water and dish soap, scrubbing with a rag until it comes away clean. This is the one time soap is appropriate on a Blackstone. Keep working at stubborn spots as you scrub. The soap and water will sometimes finish off areas that the wheel and sandpaper loosened but did not fully clear.
Dry every bit of moisture off immediately with paper towels, then fire the griddle up on all burners at medium-high for 5 to 10 minutes to drive off the rest. Bare steel rusts fast when wet. Do not leave it sitting.
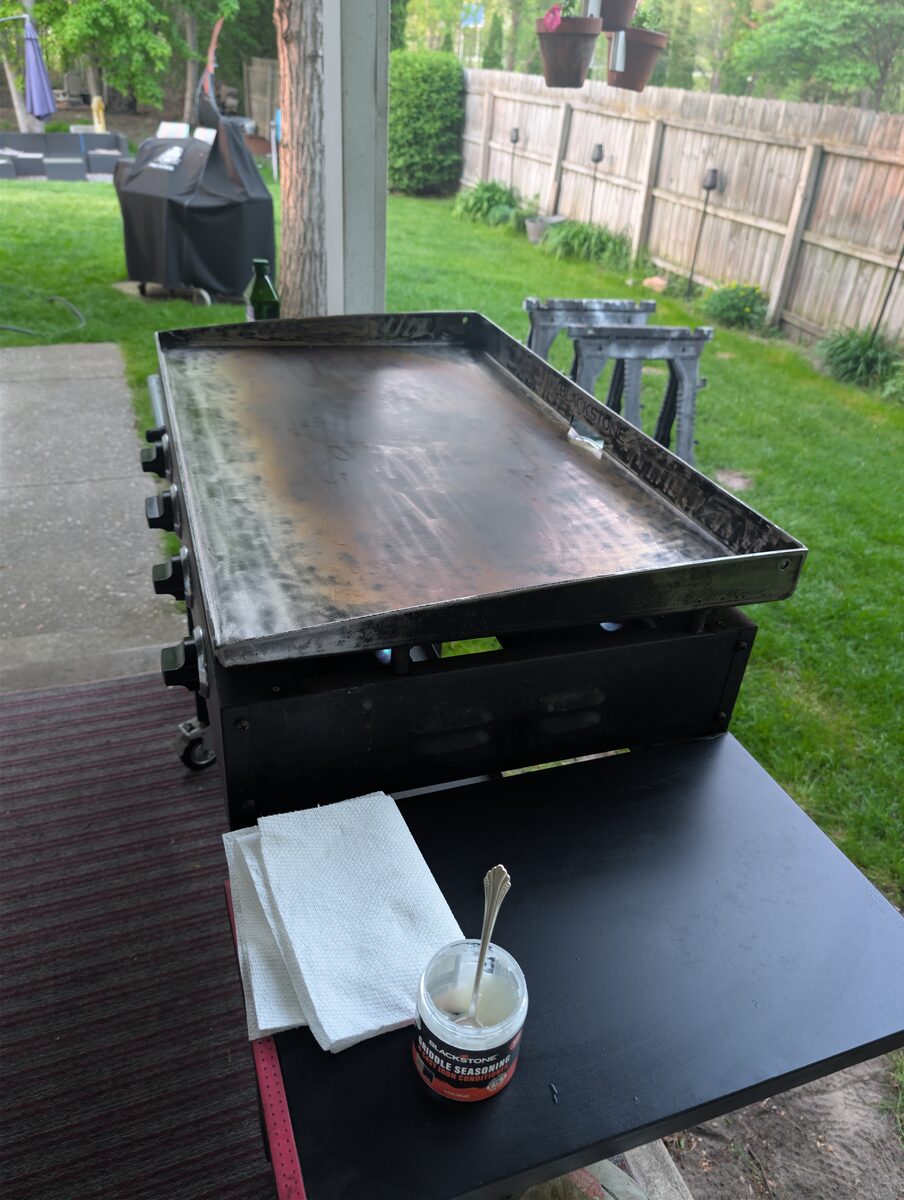
Step 4: Season in Thin Layers
With the griddle hot and fully dry, it is time to build the seasoning back up. My go-to is Blackstone Seasoning Conditioner. It is formulated specifically for this and it does the job well. If you are only going to keep one thing on hand for griddle maintenance, make it that.
That said, I also keep grapeseed oil around and throw it into the rotation. Grapeseed has a high smoke point, it polymerizes well, and it gives you a slightly different layer than the Blackstone conditioner. I am not rigid about it. Some layers are Blackstone seasoning, some are grapeseed. Both work. Switching it up never hurt anything.
Here is how the process goes. Get the griddle hot, then turn the burners down to just below full flame. Apply a very thin coat of oil across the entire surface, edges and walls included. Use paper towels and tongs to spread it until it looks almost dry. Thin is the key word. Too much oil pools and turns gummy instead of curing into a hard layer. Then crank the heat back up and let it smoke off completely until the surface stops smoking. That is one layer done.
Repeat. The guides that say 4 or 5 layers are not wrong, but they are setting a floor, not a ceiling. When I strip a griddle down to bare steel, I put on 15 layers or more. I heat it up, dial the burners to just below full, and just keep going all night. An hour or two of your evening and you have a seasoning base that will last. Why not? The oil is cheap and the results are worth it. A griddle that has been properly built up from scratch cooks better than one that never had the attention.
By the time you are deep into the layers the surface should be visibly darkening into that familiar deep black patina. That is the seasoning curing and locking in. Keep going until you are happy with how it looks.
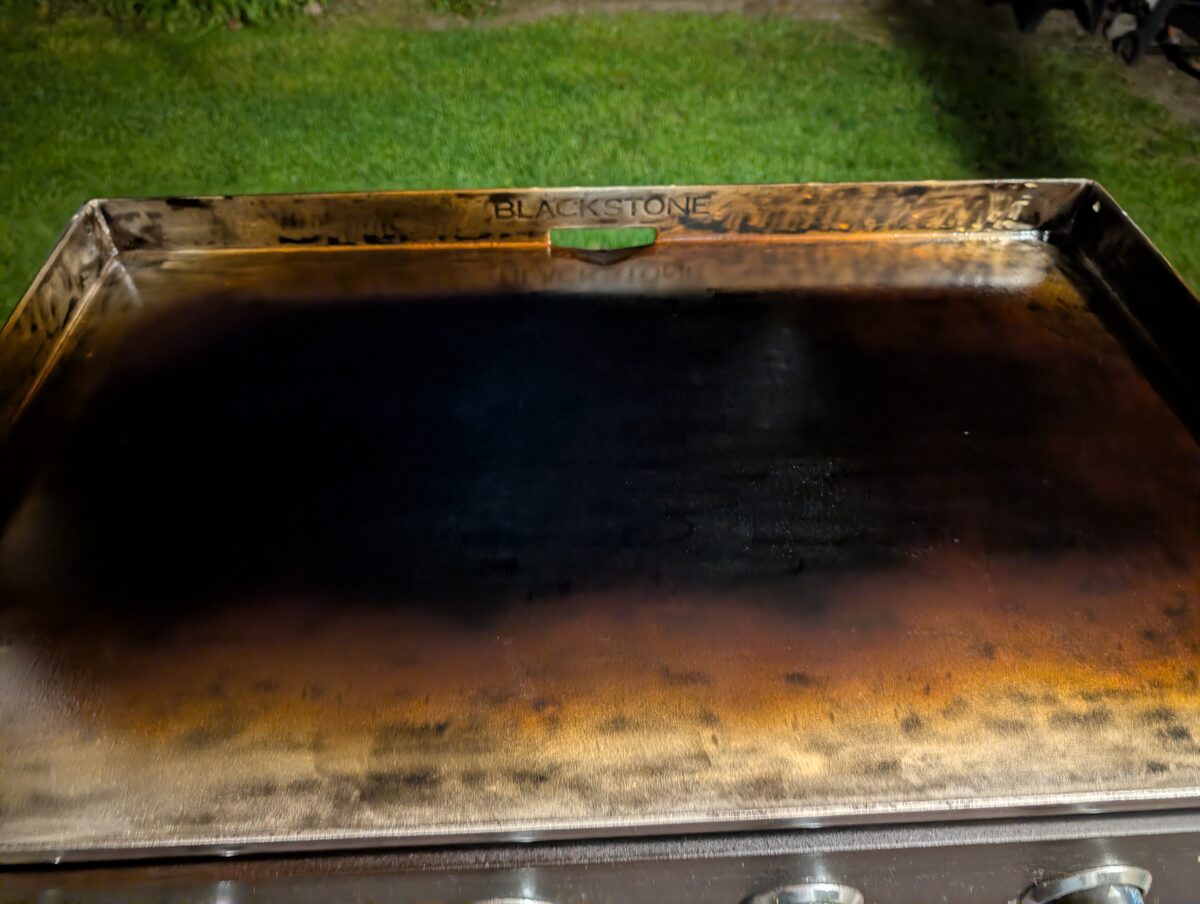
What It Looks Like After
Here is my father's griddle after stripping, washing, and building up fresh seasoning layers. The difference is hard to overstate. That is the same piece of steel that was covered in rust a few hours earlier. It is now cleaner and more ready to cook on than it has probably been in years.

When the Smoke Clears
Was It Worth It?
This is all a decent amount of work. But it is worth it. Every time I fire up my griddle this summer I am glad I did it. The photos you are looking at are actually the second griddle I have done this spring.
I was so happy with how mine turned out that I did Papa's. He left his outside all winter while he was in Florida. Mine needed attention, but his was a different level. Both of them are like glass now. Totally worth it. Just ask Papa.
Keep It This Way
Scrape after every cook, wipe it down while it is hot, add a thin layer of oil before covering, and keep it covered. You stripped this thing down to bare steel to get here. Do not let moisture sit on it again. After a few regular cooks the seasoning keeps building on its own. The hard part is already done.
Tools and Products Used
These are the exact tools and seasoning products used in this restoration. Affiliate links help keep the site free.
Featured Product
DeWalt Angle Grinder
The grinder does the heavy lifting. A quality angle grinder with consistent RPM makes the wire wheel work fast and predictable on rust and old seasoning.
Check Price on AmazonFeatured Product
Knotted Wire Wheel for Angle Grinder
Knotted wire cuts faster and more aggressively than crimped. This is the right wheel for stripping a heavily rusted flat-top griddle surface.
Check Price on AmazonFeatured Product
Blackstone Seasoning & Cast Iron Conditioner
After all that work stripping the surface, use a product made for the job. This conditioner builds the first base layers cleanly and is hard to mess up.
Check Price on AmazonFeatured Product
Grapeseed Oil
High smoke point, polymerizes well, and a great companion to the Blackstone conditioner. I rotate it in throughout the seasoning layers and keep it on hand for regular maintenance too.
Check Price on AmazonFeatured Product
Heavy-Duty Blackstone Cover
This is how you protect the work you just put in. A proper cover is the reason this restoration should only ever need to happen once.
Check Price on Amazon